
Let’s Be Real: Cake Rolls Are the Underdogs of Desserts
Do you know how some desserts are all fancy and try-hard? Well, this Raspberry Chocolate Cake Roll is nothing like that—it’s just honest-to-goodness deliciousness. Honestly, the first time I made it, I thought, “No way this is going to look cute.” Spoiler alert: It did. And even if it didn’t, it tasted amazing—like, “forget dinner, I’m just eating dessert tonight” kind of amazing. (If you’re into show-stopping desserts, check out this Decadent Grated Chocolate Croissant recipe for another crowd-pleaser.)
A Little Cake Roll History (Because Why Not?)
Okay, so cake rolls aren’t some trendy TikTok thing—they’ve been around forever. Like, your grandma probably made these for bake sales, and her grandma might’ve made them for church potlucks. They started as Swiss rolls, but let’s face it, they’re way more fun with chocolate and raspberries. For a similar cozy vibe, check out this Traditional Bundt Cake with Raisins—it’s like a warm hug in dessert form.
What You’ll Need: The Grocery List and Kitchen Stuff
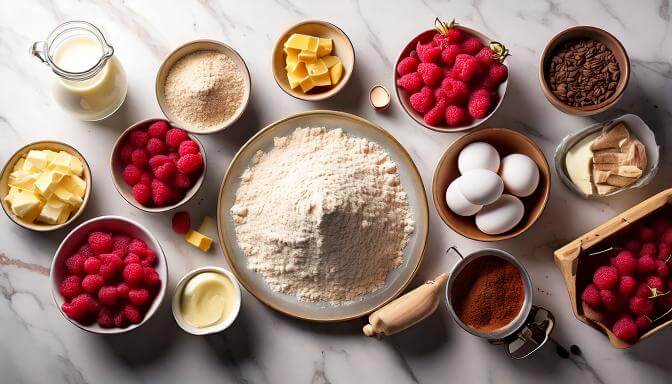
Ingredients
The Cake:
- 3 large eggs (room temp—trust me, it makes a difference)
- ½ cup granulated sugar
- ¼ cup unsweetened cocoa powder
- ½ cup all-purpose flour
- 1 tsp baking powder
- A pinch of salt (you know, the kind you throw over your shoulder for luck)
- 1 tsp vanilla extract
The Filling:
- 1 cup heavy whipping cream
- ½ cup powdered sugar
- ½ cup fresh raspberries (smash ’em a little, it’s worth it)
- 1 tsp vanilla extract
The Toppings:
- Powdered sugar for that “snowy mountain” vibe
- Fresh raspberries (because you deserve fancy)
- Optional: Drizzle of melted chocolate (it’s chocolate, so is it optional?)
Tools
- Mixing bowls (one big, one medium—don’t overthink it)
- Hand mixer or whisk (if you’re feeling strong)
- Jelly roll pan (10×15 inches—it’s a thing, Google it)
- Parchment paper
- Clean kitchen towel (this is a non-negotiable MVP)
- Offset spatula
How It Comes Together (Messy Hands = A Good Time)
Alright, let’s talk real. Making this cake roll? It’s not rocket science, but it is a little bit of an adventure—think of it like wrapping a present, only way better because the payoff is edible (and totally worth licking your fingers for). The process is equal parts satisfying and a little messy, but hey, that’s what makes it fun! If your roll isn’t perfect or your filling oozes out a little—guess what? You just made it look more homemade (which, let’s be honest, is a flex in itself).
This cake isn’t about achieving Instagram-level perfection—it’s about creating something that tastes amazing and brings joy. If the sponge cracks a bit? Dust on some extra powdered sugar or drizzle that chocolate a little more generously. If the roll isn’t as tight as you wanted? Well, congratulations, you just invented a rustic dessert trend! Imperfection is part of the charm, and anyone who takes a bite won’t care about the look—they’ll just be asking for seconds.
So, embrace the chaos. Let the kitchen get a little messy, let your creativity shine, and remember: every swipe of raspberry cream and dusting of cocoa is a love letter to dessert lovers everywhere (and yes, that includes you).
Step-by-Step Instructions: We’ve Got This
Step 1: Preheat Like a Pro
Fire up the oven to 350°F. Line your jelly roll pan with parchment paper—don’t just wing it; this will save you from a sticky mess later.
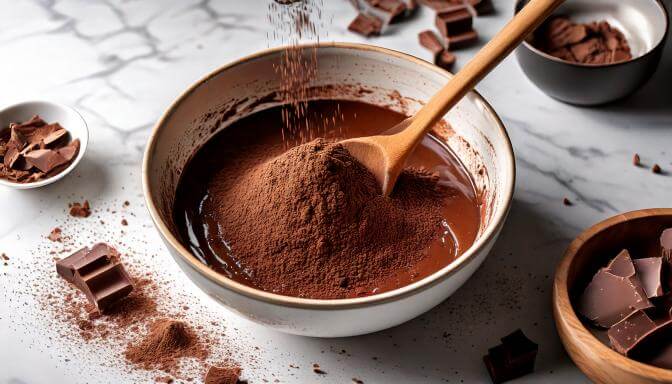
Step 2: Whip the Batter
In a big ol’ bowl, beat the eggs and sugar together until they’re all fluffy and pale yellow. Add vanilla for some extra oomph. Then, sift in your dry ingredients (that’s the cocoa, flour, baking powder, and salt) and fold gently. No aggressive stirring, okay?

Step 3: Bake (And Don’t Wander Off)
Pour the batter into the pan and spread it out evenly. Bake for 10-12 minutes. Check it with your finger—if it springs back like a marshmallow, you’re golden.
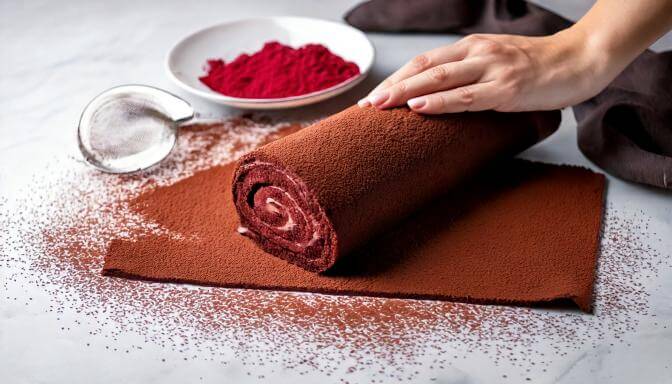
Step 4: The Towel Trick
Here’s where the magic happens: Lay a clean towel on your counter and dust it with powdered sugar. Flip your cake onto the towel, peel off the parchment paper, and—this is the fun part—roll the cake up with the towel inside. Let it cool completely while you snack on leftover raspberries.
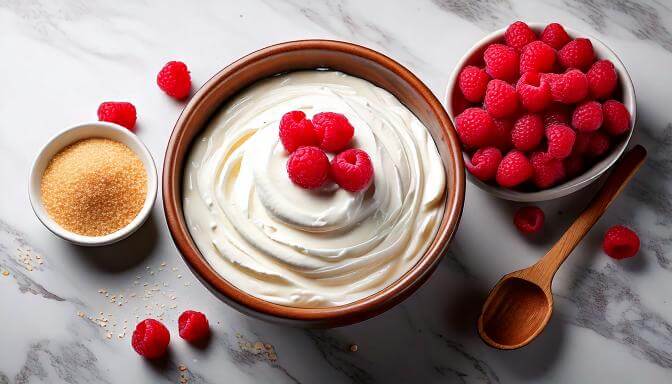
Step 5: Whip the Filling
In a medium bowl, whip the heavy cream, powdered sugar, and vanilla until it’s thick and dreamy. Gently fold in the mashed raspberries. Taste test? Oh, absolutely.
Step 6: Time to Assemble
Unroll your cooled cake, spread the filling evenly, and roll it back up without the towel. (No need to panic—it’s easier than it sounds.) Place it seam-side down on a plate.
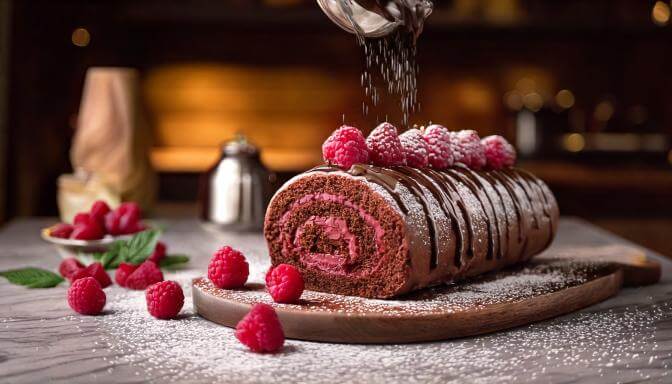
Step 7: Fancy It Up
Dust with powdered sugar, drizzle with melted chocolate and pop a few raspberries on top. Boom. Dessert is served.
Real-Talk Tips: Because You’re Gonna Nail This 🎂✨
Baking isn’t rocket science, but let’s be real—sometimes it’s the small details that make or break a recipe. These quick tips will help you roll like a pro (pun intended!) and turn out a Raspberry Chocolate Cake Roll that looks like it came straight out of a bakery window.
1. Don’t Skip the Towel: The Hero You Didn’t Know You Needed
Alright, listen up—this step might seem like extra effort, but skipping the towel is like forgetting the wrapping paper on a present. Rolling the warm cake with a lightly powdered kitchen towel not only helps it keep its shape but also prevents dreaded cracks. Without it? Your roll could end up looking like a crumpled sock (no judgment, but you deserve better!). Just grab a clean towel, sprinkle it generously with powdered sugar, and let it do the heavy lifting. Trust the process—you’ll thank me later.
2. Room Temp Eggs: The Secret to Fluffy Heaven
This is one of those little tricks that makes a big difference. Cold eggs straight out of the fridge? Not your friend. They don’t whip up as well, and you’ll end up with a sponge that’s dense instead of airy. Let your eggs sit out for about 30 minutes before starting (or cheat a bit by placing them in warm water for 5 minutes). You want that batter light and fluffy—like a cloud you can eat. And honestly, who doesn’t want that?
3. Chill Your Tools: Whipping Cream’s Best Friend
Here’s a pro tip that feels a little fancy but is super practical: pop your mixing bowl and whisk in the freezer for 10-15 minutes before whipping the cream. Why? Cold tools help the cream reach those dreamy stiff peaks faster and stay stable longer. It’s science, but the fun kind. So while your cake is cooling, toss your tools in the freezer and let them chill—literally.
Baking is About Embracing Imperfection
Let’s get one thing straight: baking isn’t some high-stakes competition (unless you’re on The Great British Baking Show—in which case, good luck!). It’s about embracing the little quirks, making a glorious mess, and ending up with something that tastes as good as it feels to create. So, if your cake roll has a crack or your powdered sugar dusting looks more like a snowstorm, who cares? It’s homemade, and that’s what makes it special.
Tips for a Fun and Smooth Baking Experience
Grab That Towel Like a Pro
No fancy equipment? No problem. That humble kitchen towel is your best friend here. Dust it with powdered sugar, and it’ll make rolling your cake a breeze while keeping cracks to a minimum. Plus, there’s something oddly satisfying about peeling the towel away from the perfectly rolled sponge.
Warm Up Those Eggs
Room-temperature eggs aren’t just a fancy baker’s suggestion—they’re the secret to a light, airy sponge. (Trust me, I’ve learned this the hard way.) If you forgot to take them out ahead of time, no stress. Just let them sit in a bowl of warm water for a few minutes. Problem solved.
Chill Those Tools
Ever notice how your whipped cream sometimes goes from fluffy to soupy in seconds? The trick is to keep things cool. Toss your mixing bowl and whisk into the freezer for 10 minutes before you start. It’s a tiny step, but it makes a huge difference—like, “cloud-like cream that holds its shape” kind of difference.
Don’t Forget to Have Fun
Oh, and one last thing—don’t forget to have fun. Turn on your favorite playlist (mine’s an embarrassing mix of 80s pop and today’s top hits), pour yourself a coffee or a glass of wine, and channel your inner dessert rockstar. Because, honestly, every great bake starts with a little extra love. 🎉
Variations to Keep Things Fun
- Berry Blast: Swap raspberries for strawberries or blueberries—whatever you’ve got.
- Coconut Dream: Use coconut cream and sprinkle shredded coconut on top.
- Coffee Lovers: Mix instant espresso into the batter for a mocha twist.
Keep Baking: More Delicious Ideas
Looking for more desserts to try? Check out these fun recipes:
Wrapping It Up (Pun Intended)
Let’s face it—this Raspberry Chocolate Cake Roll isn’t just your run-of-the-mill dessert. It’s a showstopper, a mood-lifter, and, honestly, a love letter in rolled-up chocolatey form. Whether you’re making it for a special someone, a family gathering, or just because you’re craving something indulgent (no judgment—we’ve all been there), this dessert brings joy to the table.
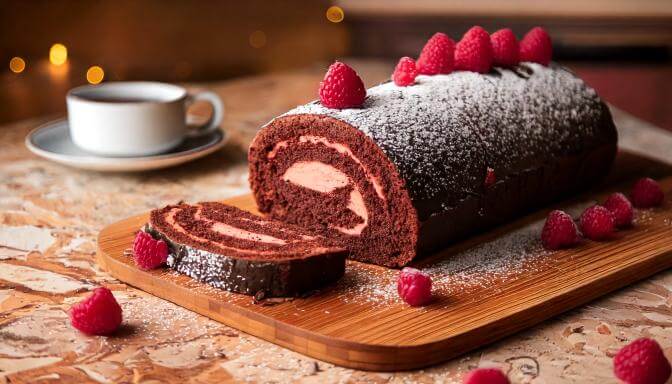
Picture this: a light, cocoa-rich sponge cradling a tangy-sweet raspberry cream, topped with a delicate dusting of powdered sugar and a few glossy drizzles of chocolate. It’s not just food—it’s a moment. It’s that kind of recipe that makes you pause mid-bite and think, “Wow, I outdid myself here.”
So go ahead—grab your whisk, preheat that oven, and embrace the mess (because let’s be real, the best desserts come with a little powdered sugar on your shirt). Enjoy the process, savor every slice, and remember: life’s way too short for boring desserts. Make something fun, make something delicious, and most importantly, make something worth sharing—even if it’s just with yourself.